Now, RFID technology has permeated every aspect of our lives—from public transit cards and access badges to clothing tags and pet microchips. You might be wondering: Can my smartphone act just like a supermarket scanner and directly read the information stored within these chips?
The answer is: In most cases, yes—but it depends on the chip’s “frequency band.”
1. The Core Principle: NFC Is Key
The smartphone’s secret weapon for scanning RFID tags is called NFC (Near Field Communication). Essentially, NFC is a subset of RFID technology specifically designed for high-frequency communication over short distances (typically within 4 centimeters).
Hardware Requirements: Your smartphone must have a built-in NFC chip (most modern smartphones—such as the iPhone 7 and later models, as well as the vast majority of Android devices—now come equipped with this feature as standard).
Software Requirements: You must enable the NFC function on your phone and use a specific app to interpret the data.
2. Not All RFID Tags Can Be Scanned
This is where misunderstandings most frequently arise. RFID tags are categorized into three types based on their operating frequency, yet smartphones can only recognize one of them:
| Frequency Category | Common Applications | Can a Phone Scan It? |
| Low Frequency (LF, 125–134 kHz) | Pet microchips, older access cards | No (Hardware incompatibility) |
| High Frequency (HF, 13.56 MHz) | Transit cards, bank cards, passports, national ID cards | Yes (This is the frequency used by NFC) |
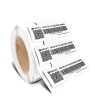
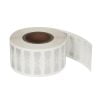
| Ultra-High Frequency (UHF, 860–960 MHz) | Logistics warehouses, clothing store security tags | No (Requires specialized equipment due to longer range) |
> Quick Fact: If you try to scan a pet’s microchip with your phone, you typically won’t get a response, as most pet microchips operate on the Low Frequency (LF) band.
3. Specific Steps for Scanning with a Smartphone
Step 1: Enable NFC
- Android: Locate “NFC” in your phone’s “Settings” menu or in the quick-access drop-down panel, and toggle it on.
- iPhone: Enabled by default (iPhones do not require a manual on/off switch; the feature activates automatically whenever the device is brought close to a compatible tag and a corresponding app is available).
Step 2: Download a Scanning App
Your phone’s native “Wallet” app is typically only capable of scanning supported transit cards or credit/debit cards. To read “raw data,” you will need more specialized tools:
Recommended Apps: *NFC Tools*, *NFC TagWriter*, or *Mifare Classic Tool* (available on select Android devices only).
Step 3: Locate the Sensing Area
Hold the RFID chip close to the NFC sensing center on the back of your phone:
- iPhone: Typically located near the top of the back panel (close to the camera).
- Android: Usually located in the center of the back panel or near the camera module.
4. What Information Can Your Phone Scan?
Once you have successfully scanned a tag, you may see the following types of information:
- ID Serial Number: The unique “identification number” for that specific chip.
- Stored Text: Information such as URLs or product batch numbers written into anti-counterfeit tags.
- Encryption Status: Your phone will indicate whether the chip is encrypted (as is the case with bank cards or high-security access cards).
5. Security Alert: Can Your Phone “Clone” Cards?
Many people want to “copy” their residential access cards onto their phones by scanning them.
- Non-Encrypted Cards: Your phone can easily read the ID and emulate the card.
- Encrypted Cards: For security reasons, while your phone can detect the presence of these cards, it cannot directly read or clone the data contained within their encrypted sectors.
Summary: As long as the frequency matches (13.56 MHz), your smartphone acts as a powerful RFID scanner. While it may not allow you to “see through” every shipping package, it is more than capable of handling your everyday smart card needs!